

How to Screenshot on Mac
Taking a screenshot on a Mac is quick and easy once you know the correct keyboard shortcuts. Whether you want to capture your entire screen, a specific window, or just part of the display, macOS includes powerful built-in tools that don’t require any additional software.
In this guide, you’ll learn every method to take screenshots on a Mac, where screenshots are saved, how to edit them, and how to solve common screenshot issues.
Why Take Screenshots on a Mac?
Screenshots are useful for:
- Creating tutorials
- Reporting software bugs
- Saving important information
- Sharing conversations
- Capturing receipts
- Making presentations
- Recording online classes
- Creating blog posts
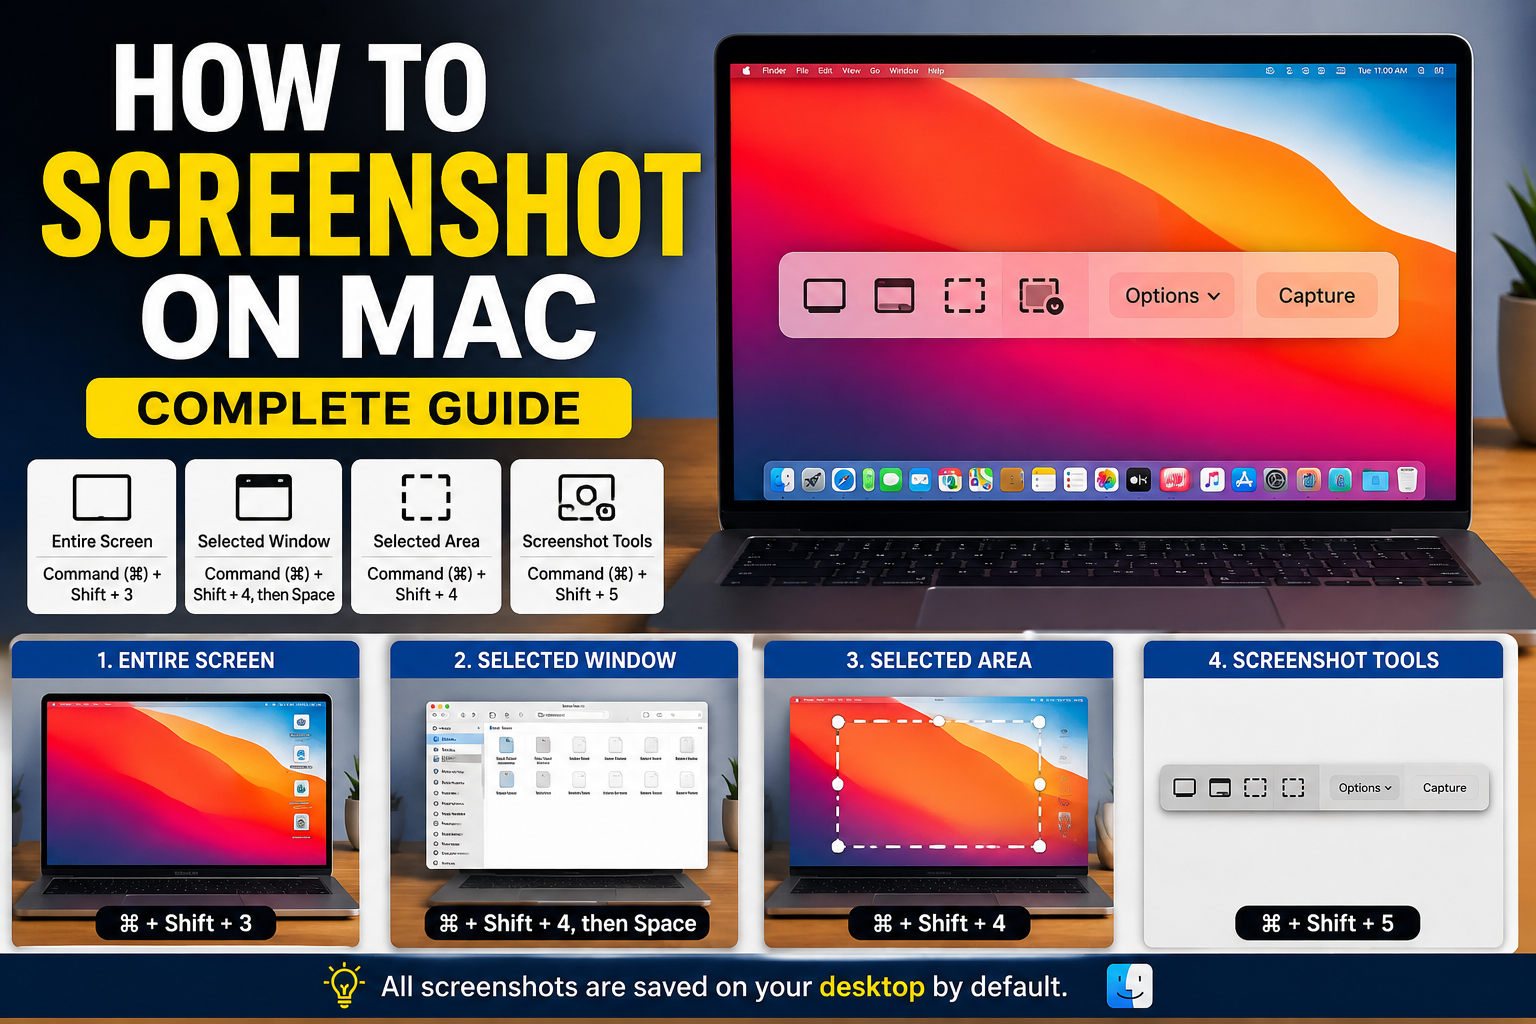
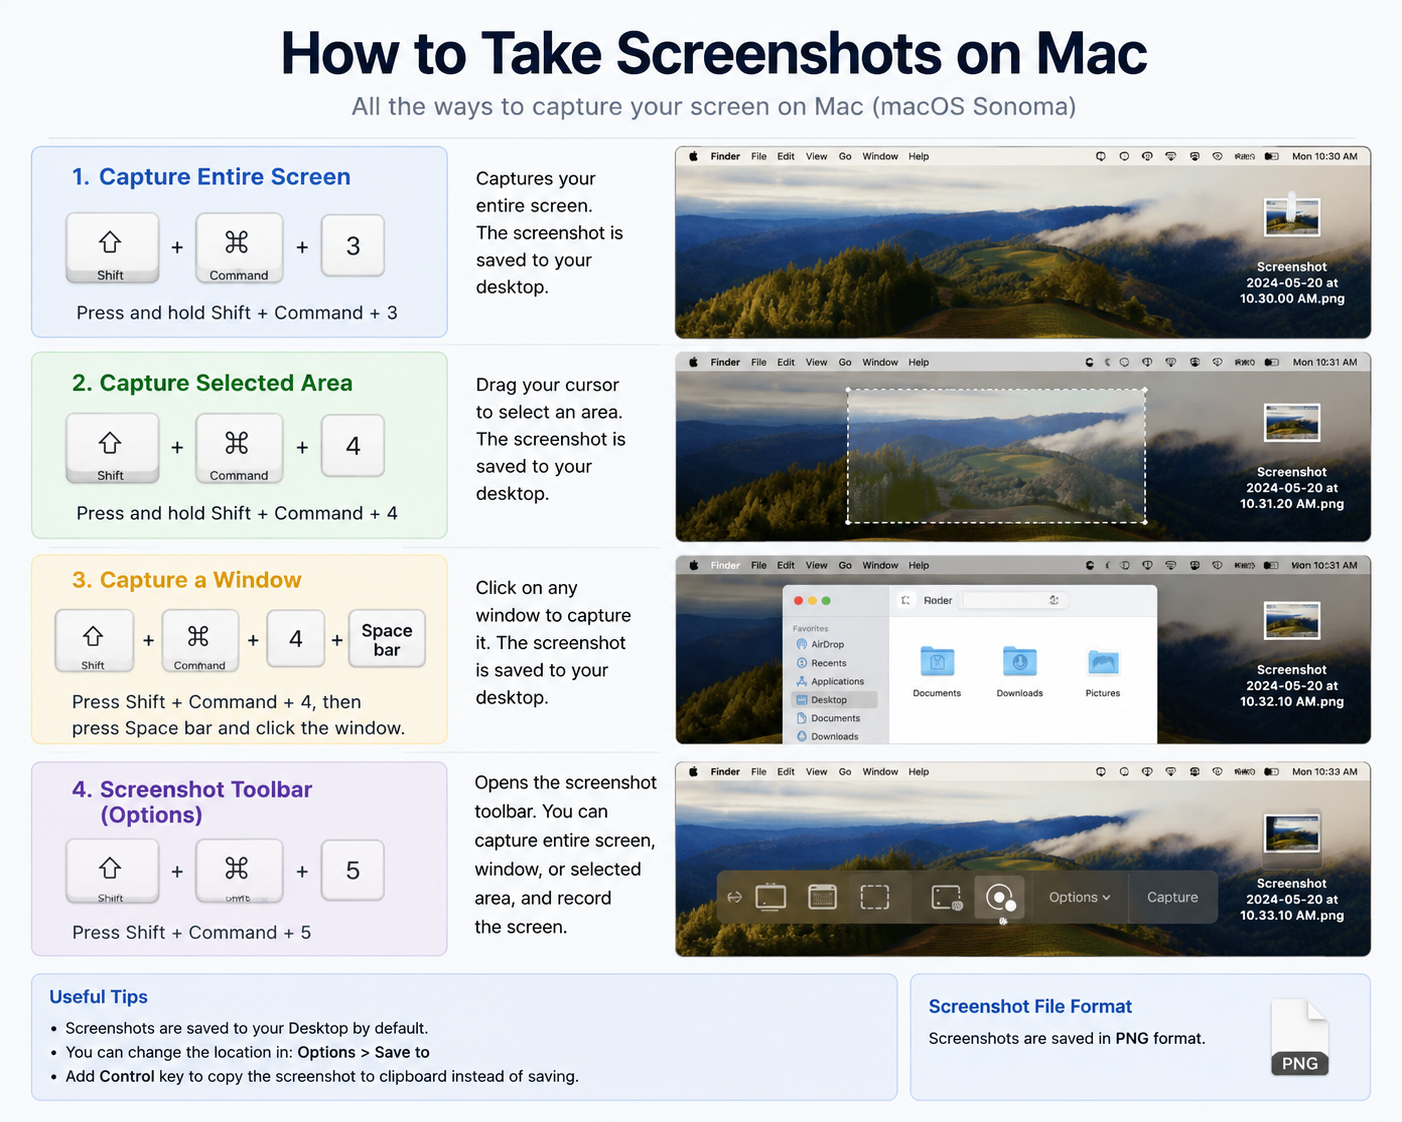
Method 1: Capture the Entire Screen
Keyboard Shortcut
Press:
Shift + Command (⌘) + 3
Steps
- Open the screen you want to capture.
- Press Shift + Command + 3.
- You’ll hear the camera shutter sound (if enabled).
- A thumbnail appears in the bottom-right corner.
- Click it to edit or wait for it to save automatically.
Result:
The entire display is captured.
Screenshot Placeholder
Insert Screenshot: Pressing Shift + Command + 3
Image Alt Text:
Mac keyboard shortcut Shift Command 3 to capture full screen
Method 2: Capture Part of the Screen
Keyboard Shortcut
Shift + Command + 4
Steps
- Press Shift + Command + 4.
- Your cursor changes into a crosshair.
- Click and drag to select the area.
- Release the mouse.
- The screenshot is saved automatically.
Perfect for capturing:
- Images
- Documents
- Error messages
- Specific menus
Screenshot Placeholder
Insert Screenshot: Selecting a screen area
Image Alt Text
Selecting an area for screenshot on Mac
Method 3: Capture a Specific Window
Shortcut
Shift + Command + 4
Then press Spacebar
Steps
- Press Shift + Command + 4.
- Press the Spacebar.
- The cursor changes into a camera.
- Move it over the desired window.
- Click the window.
The selected window will be captured with its shadow.
Screenshot Placeholder
Insert Screenshot: Camera icon over a Finder window
Image Alt Text
Capture a specific application window on Mac
Method 4: Open the Screenshot Toolbar
Keyboard Shortcut
Shift + Command + 5
This opens the built-in Screenshot Toolbar.
It allows you to:
- Capture Entire Screen
- Capture Selected Window
- Capture Selected Portion
- Record Entire Screen
- Record Selected Portion
- Set Timer
- Change Save Location
- Show Mouse Pointer
Screenshot Placeholder
Insert Screenshot: Screenshot toolbar
Image Alt Text
Mac Screenshot Toolbar options
Method 5: Take a Screenshot of the Touch Bar
(For Macs with a Touch Bar)
Shortcut:
Shift + Command + 6
The Touch Bar image is saved automatically.
Where Are Screenshots Saved?
By default, screenshots are saved on the Desktop.
Example filename:
Screenshot 2026-08-05 at 10.30.21 AM.png
Change Screenshot Save Location
- Press Shift + Command + 5
- Click Options
- Choose:
- Desktop
- Documents
- Downloads
- Clipboard
- Messages
- Preview
- Other Location
Copy Screenshot to Clipboard Instead of Saving
Add the Control key.
Example:
Control + Shift + Command + 3
or
Control + Shift + Command + 4
Now you can paste directly into:
- Microsoft Word
- Pages
- Photoshop
- Slack
Edit Screenshots Immediately
After taking a screenshot:
- Click the floating thumbnail.
- The Markup editor opens.
You can:
- Crop
- Draw
- Highlight
- Add arrows
- Add text
- Sign documents
- Rotate
- Resize
Screenshot Using Preview App
You can also use Preview.
Steps:
- Open Preview.
- Click File.
- Select Take Screenshot.
- Choose:
- From Selection
- From Window
- From Entire Screen
Screenshot Using Grab (Older macOS)
Older versions of macOS included the Grab application.
Newer versions replaced it with the Screenshot Toolbar.
Screenshot Keyboard Shortcut Summary
| Action | Shortcut |
|---|---|
| Entire Screen | Shift + Command + 3 |
| Selected Area | Shift + Command + 4 |
| Selected Window | Shift + Command + 4, then Space |
| Screenshot Toolbar | Shift + Command + 5 |
| Touch Bar | Shift + Command + 6 |
How to Take Scrolling Screenshots on Mac
macOS does not include a built-in scrolling screenshot feature for all apps.
You can use third-party tools such as:
- CleanShot X
- Snagit
- Shottr
- Microsoft Edge (Web Capture)
- Google Chrome extensions
How to Screenshot Without Keyboard Shortcuts
- Press Shift + Command + 5
- Use the Screenshot Toolbar.
- Click the capture option.
- Save the image.
Common Screenshot Problems
Screenshot Not Working
Try:
- Restart your Mac.
- Check keyboard shortcuts in System Settings.
- Make sure the keyboard is working.
- Update macOS.
Screenshot Saved But Can’t Find It
Search in Finder for:
Screenshot
Or check:
- Desktop
- Downloads
- Documents
Floating Thumbnail Doesn’t Appear
Go to:
Shift + Command + 5 → Options → Show Floating Thumbnail
Enable it.
Tips for Better Screenshots
- Close unnecessary windows.
- Hide personal information.
- Use a clean desktop background.
- Crop unwanted areas.
- Highlight important sections.
- Save screenshots in organized folders.
Frequently Asked Questions (FAQs)
How do I screenshot on a Mac?
Press Shift + Command + 3 to capture the entire screen or Shift + Command + 4 to select an area.
Where are screenshots saved?
By default, they are saved on the Desktop.
How do I take a screenshot of one window?
Press Shift + Command + 4, then Spacebar, and click the window.
Can I record my screen on a Mac?
Yes. Press Shift + Command + 5 and choose one of the screen recording options.
Can I change where screenshots are saved?
Yes. Open the Screenshot Toolbar with Shift + Command + 5, click Options, and select a different save location.
Conclusion
macOS makes taking screenshots simple with built-in keyboard shortcuts and the Screenshot Toolbar. Whether you need to capture the full screen, a specific window, or a selected area, these tools provide a fast and efficient way to create high-quality screenshots without installing additional software. By learning the shortcuts and customization options, you can improve your workflow and easily create screenshots for work, study, or personal use.