
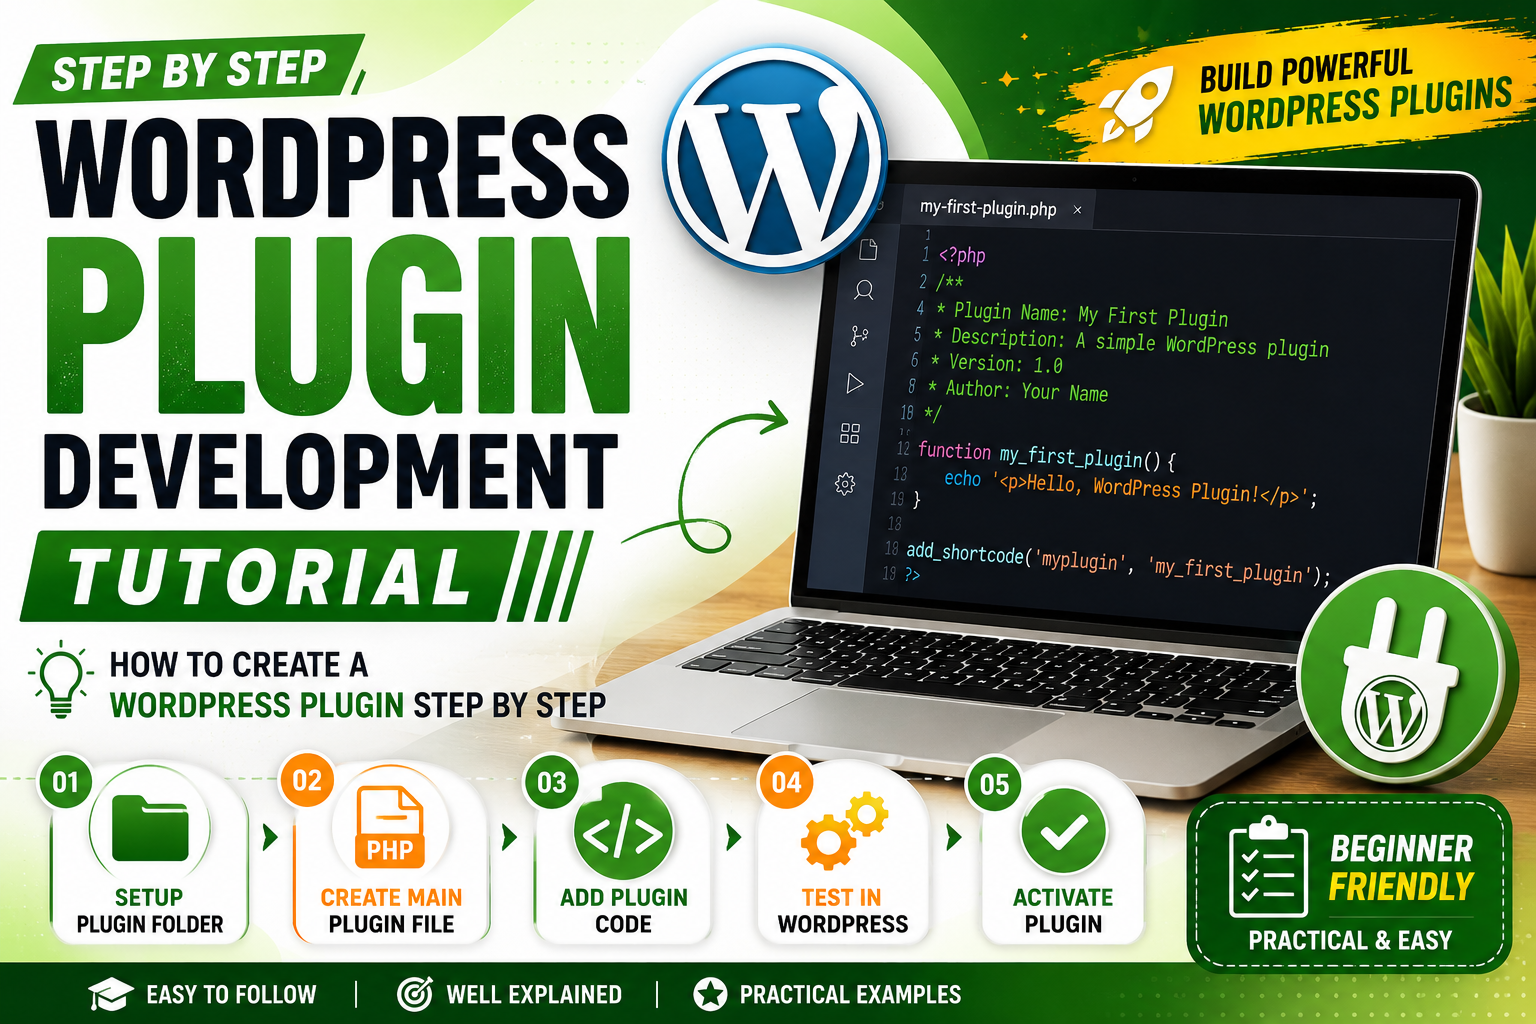
WordPress plugin development allows you to extend WordPress without modifying the platform’s core files. Whether you want to add a custom contact form, SEO feature, calculator, dashboard widget, API integration, membership functionality, or an entirely new application, a plugin is usually the right way to build it.
This step-by-step WordPress plugin development tutorial is designed for beginners but also introduces professional development practices. We will build a simple working plugin from scratch and gradually add useful functionality.

1. What Is a WordPress Plugin?
A WordPress plugin is a collection of PHP files, and potentially JavaScript, CSS, images, and other resources, that adds or changes functionality in WordPress.
For example, a plugin can add:
- Contact forms
- SEO tools
- Security features
- Payment systems
- Custom post types
- Shortcodes
- WooCommerce functionality
- Analytics dashboards
- API integrations
- Custom admin pages
- Membership systems
- Performance tools
- AI-powered features
The major advantage is that plugin functionality remains separate from WordPress core.
If you change WordPress core files directly, your changes can disappear after an update. A properly developed plugin avoids that problem.
2. Why Develop a WordPress Plugin?
Learning plugin development gives you considerably more control than installing existing plugins.
Build custom functionality
Suppose your business requires a calculator that does not exist in the WordPress plugin directory. Instead of changing your theme or WordPress core, you can create your own plugin.
Keep functionality independent from the theme
Theme files should primarily control presentation. Plugins should generally handle functionality.
For example:
Theme: Controls colors, typography, layouts and templates.
Plugin: Handles forms, calculations, custom data, APIs and business logic.
This separation makes websites easier to maintain.
Create plugins for clients
WordPress plugin development can also become a professional development skill. Developers can create custom plugins for businesses and websites.
3. What You Need Before Starting
You do not need to be an advanced programmer to begin.
However, basic knowledge of the following will help:
- HTML
- CSS
- PHP
- JavaScript
- WordPress administration
- Basic SQL
- WordPress hooks
You should also have a WordPress development environment.
You can work with:
- A local WordPress installation
- A staging website
- A development server
- A test hosting account
Never experiment with untested plugin code directly on an important production website.
4. How WordPress Plugins Work
WordPress loads active plugins during its normal execution process.
A plugin can connect to WordPress through hooks.
There are two primary types:
Actions
Actions allow your plugin to execute code at particular points.
Example:
add_action( 'init', 'my_plugin_initialize' );

function my_plugin_initialize() {
    // Plugin initialization code.
}
Filters
Filters allow you to modify data before WordPress uses or displays it.
Example:
add_filter( 'the_content', 'my_plugin_modify_content' );

function my_plugin_modify_content( $content ) {
    return $content . '<p>Extra information.</p>';
}
Hooks are one of the most important concepts in WordPress development.
5. Create Your First WordPress Plugin
Let’s create a simple plugin called:
My First WordPress Plugin
Navigate to:
wp-content/plugins/
Create a new directory:
my-first-plugin
Inside this directory, create:
my-first-plugin.php
Your structure should look like this:
wp-content/
└── plugins/
    └── my-first-plugin/
        └── my-first-plugin.php
6. Add a Plugin Header
Open my-first-plugin.php and add:
<?php
/**
 * Plugin Name: My First WordPress Plugin
 * Plugin URI: https://example.com/
 * Description: A simple beginner WordPress plugin.
 * Version: 1.0.0
 * Author: Your Name
 * Author URI: https://example.com/
 * License: GPL-2.0-or-later
 * Text Domain: my-first-plugin
 */

if ( ! defined( 'ABSPATH' ) ) {
    exit;
}
The plugin header tells WordPress important information about your plugin.
Important fields
Plugin Name
The name displayed in the WordPress Plugins screen.
Description
Explains what the plugin does.
Version
Identifies the current plugin version.
Author
Identifies the developer or organization.
License
Defines how the plugin can be distributed.
7. Activate the Plugin
Log in to your WordPress dashboard.
Go to:
Plugins → Installed Plugins
You should see:
My First WordPress Plugin
Click:
Activate
If the plugin activates successfully, your basic plugin is working.
At this stage, it does not visibly change the website. That is normal.
8. Create a Custom Shortcode
Now let’s make the plugin useful.
We will create a shortcode:
[my_plugin_message]
Add this code:
function my_plugin_message_shortcode() {
    return '<div class="my-plugin-message">Hello! This message was generated by my WordPress plugin.</div>';
}

add_shortcode( 'my_plugin_message', 'my_plugin_message_shortcode' );
You can now place:
[my_plugin_message]
inside a WordPress page or post.
WordPress will execute your plugin and display the generated message.
9. Improve the Shortcode With HTML
We can make the output more useful.
function my_plugin_message_shortcode() {

    ob_start();
    ?>

    <div class="my-plugin-message">
        <h3>Welcome!</h3>
        <p>This content was generated by a custom WordPress plugin.</p>
    </div>

    <?php

    return ob_get_clean();
}

add_shortcode( 'my_plugin_message', 'my_plugin_message_shortcode' );
This approach becomes useful when a shortcode needs to generate multiple HTML elements.
10. Add CSS to Your Plugin
Create:
assets/css/style.css
Your structure becomes:
my-first-plugin/
├── my-first-plugin.php
└── assets/
    └── css/
        └── style.css
Add:
.my-plugin-message {
    padding: 20px;
    border: 1px solid #ddd;
    border-radius: 8px;
    margin: 20px 0;
}

.my-plugin-message h3 {
    margin-top: 0;
}
Now enqueue the stylesheet.
function my_plugin_enqueue_styles() {

    wp_enqueue_style(
        'my-plugin-style',
        plugin_dir_url( __FILE__ ) . 'assets/css/style.css',
        array(),
        '1.0.0'
    );
}

add_action( 'wp_enqueue_scripts', 'my_plugin_enqueue_styles' );
Using wp_enqueue_style() is preferable to inserting stylesheet code manually into the page.
11. Add an Admin Settings Page
A professional plugin often needs an administration interface.
For example, let’s allow the administrator to change the message.
First create an admin menu:
function my_plugin_admin_menu() {

    add_options_page(
        'My Plugin Settings',
        'My Plugin',
        'manage_options',
        'my-plugin-settings',
        'my_plugin_settings_page'
    );
}

add_action( 'admin_menu', 'my_plugin_admin_menu' );
Now create the settings page:
function my_plugin_settings_page() {
    ?>

    <div class="wrap">
        <h1>My Plugin Settings</h1>

        <form method="post" action="options.php">

            <?php
            settings_fields( 'my_plugin_settings_group' );
            do_settings_sections( 'my-plugin-settings' );
            submit_button();
            ?>

        </form>
    </div>

    <?php
}
12. Register Plugin Settings
Now register a setting.
function my_plugin_register_settings() {

    register_setting(
        'my_plugin_settings_group',
        'my_plugin_message'
    );

    add_settings_section(
        'my_plugin_main_section',
        'Message Settings',
        '__return_false',
        'my-plugin-settings'
    );

    add_settings_field(
        'my_plugin_message',
        'Custom Message',
        'my_plugin_message_field',
        'my-plugin-settings',
        'my_plugin_main_section'
    );
}

add_action( 'admin_init', 'my_plugin_register_settings' );
Now create the field:
function my_plugin_message_field() {

    $message = get_option(
        'my_plugin_message',
        'Hello from my WordPress plugin!'
    );

    ?>

    <input
        type="text"
        name="my_plugin_message"
        value="<?php echo esc_attr( $message ); ?>"
        class="regular-text"
    />

    <?php
}
The administrator can now save a custom message.
13. Display the Saved Setting
Modify the shortcode:
function my_plugin_message_shortcode() {

    $message = get_option(
        'my_plugin_message',
        'Hello from my WordPress plugin!'
    );

    return '<div class="my-plugin-message">' .
        esc_html( $message ) .
        '</div>';
}

add_shortcode( 'my_plugin_message', 'my_plugin_message_shortcode' );
Notice the use of:
esc_html()
This is important for safe output.
14. Understanding WordPress Hooks
Hooks are the foundation of WordPress plugin development.
For example:
add_action( 'init', 'my_function' );
means:
“When WordPress reaches the init action, execute my_function().”
Another example:
add_action( 'wp_footer', 'my_footer_message' );

function my_footer_message() {
    echo '<p>Plugin message.</p>';
}
This adds content near the WordPress footer.
15. Actions vs Filters
A simple way to remember the difference:
Action
Do something.
add_action( 'init', 'my_function' );
Filter
Change something.
add_filter( 'the_title', 'my_change_title' );
Example:
function my_change_title( $title ) {
    return '★ ' . $title;
}

add_filter( 'the_title', 'my_change_title' );
This modifies post titles when the filter runs.
16. WordPress Plugin Security
Security should be considered from the beginning, not added after the plugin is finished.
A plugin may process:
- User input
- Form submissions
- URLs
- Database queries
- Uploaded files
- API responses
- Administrator settings
All of these require careful handling.
17. Prevent Direct File Access
A common protection is:
if ( ! defined( 'ABSPATH' ) ) {
    exit;
}
This prevents the plugin file from being executed directly in an inappropriate context.
18. Sanitize User Input
Suppose a user submits a text field.
Do not blindly save it.
Instead:
$name = sanitize_text_field( $_POST['name'] );
For an email:
$email = sanitize_email( $_POST['email'] );
For a URL:
$url = esc_url_raw( $_POST['url'] );
Sanitization helps ensure that stored data is in an appropriate format.
19. Escape Output
Sanitization and escaping are different.
When displaying content, escape it according to its context.
HTML text
echo esc_html( $message );
HTML attribute
echo esc_attr( $value );
URL
echo esc_url( $url );
A useful principle is:
Sanitize data when accepting or storing it, and escape data when outputting it.
20. Use Nonces
If your plugin processes forms or administrative requests, WordPress nonces are an important security mechanism.
Example:
wp_nonce_field( 'my_plugin_save_settings', 'my_plugin_nonce' );
Then verify:
if (
    ! isset( $_POST['my_plugin_nonce'] ) ||
    ! wp_verify_nonce(
        $_POST['my_plugin_nonce'],
        'my_plugin_save_settings'
    )
) {
    return;
}
Nonces help protect requests against certain types of unauthorized actions.
21. Check User Capabilities
Do not assume that everyone accessing an admin page is authorized.
Use capability checks such as:
if ( ! current_user_can( 'manage_options' ) ) {
    return;
}
This is especially important when your plugin changes settings, deletes data, or performs administrative operations.
22. Use the WordPress Database Safely
For many simple settings, WordPress options are sufficient.
For example:
update_option(
    'my_plugin_message',
    'Hello WordPress!'
);
Retrieve it with:
$message = get_option( 'my_plugin_message' );
Delete it with:
delete_option( 'my_plugin_message' );
For larger datasets, you may eventually need a custom database table.
23. Creating a Custom Database Table
Suppose you are building a plugin that stores thousands of records.
You can create a custom table during plugin activation.
function my_plugin_create_table() {

    global $wpdb;

    $table_name = $wpdb->prefix . 'my_plugin_data';

    $charset_collate = $wpdb->get_charset_collate();

    $sql = "CREATE TABLE $table_name (
        id bigint(20) unsigned NOT NULL AUTO_INCREMENT,
        name varchar(255) NOT NULL,
        created_at datetime NOT NULL,
        PRIMARY KEY (id)
    ) $charset_collate;";

    require_once ABSPATH . 'wp-admin/includes/upgrade.php';

    dbDelta( $sql );
}

register_activation_hook(
    __FILE__,
    'my_plugin_create_table'
);
The dbDelta() function is commonly used for creating or updating WordPress database tables.
24. Use $wpdb Carefully
WordPress provides the $wpdb database abstraction.
Example:
global $wpdb;

$table_name = $wpdb->prefix . 'my_plugin_data';

$wpdb->insert(
    $table_name,
    array(
        'name'       => 'Example',
        'created_at' => current_time( 'mysql' ),
    ),
    array(
        '%s',
        '%s',
    )
);
For custom SQL queries involving user-controlled values, use prepared queries.
$result = $wpdb->get_results(
    $wpdb->prepare(
        "SELECT * FROM $table_name WHERE name = %s",
        $name
    )
);
Never build SQL queries by directly concatenating untrusted user input.
25. Plugin Activation
Activation hooks allow you to perform tasks when a plugin is activated.
Example:
register_activation_hook(
    __FILE__,
    'my_plugin_activate'
);

function my_plugin_activate() {

    add_option(
        'my_plugin_message',
        'Welcome to my plugin!'
    );
}
Typical activation tasks include:
- Creating database tables
- Creating default settings
- Registering initial configuration
- Preparing plugin data
26. Plugin Deactivation
Deactivation is different from uninstalling.
A deactivation hook can be registered with:
register_deactivation_hook(
    __FILE__,
    'my_plugin_deactivate'
);

function my_plugin_deactivate() {

    // Temporary cleanup tasks.
}
You generally should not automatically destroy important user data simply because a plugin was deactivated.
27. Plugin Uninstall
Uninstalling is where permanent cleanup can happen, if your plugin’s design requires it.
A common approach is to create:
uninstall.php
Example:
<?php

if ( ! defined( 'WP_UNINSTALL_PLUGIN' ) ) {
    exit;
}

delete_option( 'my_plugin_message' );
Before deleting user data, consider whether users expect the information to survive reinstallation or temporary deactivation.
28. Professional Plugin Folder Structure
As your plugin grows, putting everything into one PHP file becomes difficult.
A better structure could be:
my-first-plugin/
│
├── my-first-plugin.php
├── uninstall.php
│
├── includes/
│   ├── class-plugin.php
│   ├── class-admin.php
│   └── class-frontend.php
│
├── admin/
│   ├── css/
│   │   └── admin.css
│   └── js/
│       └── admin.js
│
├── public/
│   ├── css/
│   │   └── public.css
│   └── js/
│       └── public.js
│
├── assets/
│   └── images/
│
└── languages/
This structure makes larger plugins easier to maintain.
29. Use Classes for Larger Plugins
For small plugins, procedural PHP can be enough.
For larger projects, object-oriented programming can help organize functionality.
Example:
class My_First_Plugin {

    public function __construct() {

        add_action(
            'init',
            array( $this, 'initialize' )
        );
    }

    public function initialize() {

        // Plugin initialization.
    }
}

new My_First_Plugin();
As your plugin becomes more complex, classes can separate administration, frontend functionality, database operations, APIs and other components.
30. Add JavaScript to Your Plugin
Create:
assets/js/script.js
Then enqueue it:
function my_plugin_enqueue_scripts() {

    wp_enqueue_script(
        'my-plugin-script',
        plugin_dir_url( __FILE__ ) . 'assets/js/script.js',
        array(),
        '1.0.0',
        true
    );
}

add_action(
    'wp_enqueue_scripts',
    'my_plugin_enqueue_scripts'
);
This allows your plugin to add interactive frontend functionality.
31. Add an AJAX Feature
WordPress supports AJAX requests through its AJAX infrastructure.
For example, you can create an action:
add_action(
    'wp_ajax_my_plugin_action',
    'my_plugin_ajax_handler'
);

function my_plugin_ajax_handler() {

    check_ajax_referer(
        'my_plugin_nonce',
        'nonce'
    );

    if ( ! current_user_can( 'manage_options' ) ) {
        wp_send_json_error(
            array(
                'message' => 'Permission denied.'
            )
        );
    }

    wp_send_json_success(
        array(
            'message' => 'Request completed.'
        )
    );
}
For public AJAX functionality, WordPress also provides the wp_ajax_nopriv_ hook.
32. Internationalization
If you want other developers and users to translate your plugin, use WordPress translation functions.
Instead of:
echo 'Hello World';
use:
echo esc_html__(
    'Hello World',
    'my-first-plugin'
);
The second parameter is your plugin’s text domain.
Internationalization is especially important for plugins intended for public distribution.
33. Add a Custom Post Type
Plugins can also register custom post types.
Example:
function my_plugin_register_book_post_type() {

    register_post_type(
        'book',
        array(
            'labels' => array(
                'name'          => 'Books',
                'singular_name' => 'Book',
            ),
            'public'       => true,
            'show_in_rest' => true,
            'supports'     => array(
                'title',
                'editor',
                'thumbnail',
            ),
        )
    );
}

add_action(
    'init',
    'my_plugin_register_book_post_type'
);
Now your plugin can create a separate “Books” content type.
34. Debugging Your Plugin
Plugin development almost always involves debugging.
WordPress provides debugging functionality.
In a development environment, you can enable:
define( 'WP_DEBUG', true );
define( 'WP_DEBUG_LOG', true );
define( 'WP_DEBUG_DISPLAY', false );
Errors can then be recorded in:
wp-content/debug.log
A simple logging example:
error_log(
    'My plugin reached this point.'
);
Use debugging tools during development and avoid exposing sensitive error information to normal website visitors.
35. Common Plugin Development Errors
Syntax errors
A missing semicolon or bracket can stop PHP execution.
Example:
$message = 'Hello'
The semicolon is missing.
Correct:
$message = 'Hello';
Function name conflicts
Another plugin may already use the same function name.
Instead of:
function save_data() {
}
use a unique prefix:
function my_plugin_save_data() {
}
For larger plugins, namespaces can also help.
36. Avoid Global Namespace Problems
WordPress websites can contain code from many plugins and themes.
If two plugins define the same function, a fatal error can occur.
Unique prefixes are a simple solution:
my_plugin_
For example:
my_plugin_activate()
my_plugin_settings()
my_plugin_save_data()
More advanced plugins can use PHP namespaces.
37. Do Not Modify WordPress Core
Never solve a plugin requirement by editing files inside:
wp-admin/
wp-includes/
or other WordPress core files.
WordPress updates can overwrite those changes.
Instead, use:
- Actions
- Filters
- APIs
- Custom post types
- Options
- Custom database tables
- REST API
- Shortcodes
- Blocks
38. Build a Complete Mini Plugin
Let’s combine the concepts into a simple plugin.
Create:
my-first-plugin/
└── my-first-plugin.php
Use:
<?php
/**
 * Plugin Name: My First WordPress Plugin
 * Description: A simple custom message plugin.
 * Version: 1.0.0
 * Author: Your Name
 * License: GPL-2.0-or-later
 * Text Domain: my-first-plugin
 */

if ( ! defined( 'ABSPATH' ) ) {
    exit;
}

/**
 * Add admin menu.
 */
function my_plugin_admin_menu() {

    add_options_page(
        'My Plugin Settings',
        'My Plugin',
        'manage_options',
        'my-plugin-settings',
        'my_plugin_settings_page'
    );
}

add_action(
    'admin_menu',
    'my_plugin_admin_menu'
);

/**
 * Register settings.
 */
function my_plugin_register_settings() {

    register_setting(
        'my_plugin_settings_group',
        'my_plugin_message',
        array(
            'sanitize_callback' => 'sanitize_text_field',
        )
    );

    add_settings_section(
        'my_plugin_main_section',
        'Message Settings',
        '__return_false',
        'my-plugin-settings'
    );

    add_settings_field(
        'my_plugin_message',
        'Custom Message',
        'my_plugin_message_field',
        'my-plugin-settings',
        'my_plugin_main_section'
    );
}

add_action(
    'admin_init',
    'my_plugin_register_settings'
);

/**
 * Settings field.
 */
function my_plugin_message_field() {

    $message = get_option(
        'my_plugin_message',
        'Hello from my WordPress plugin!'
    );

    ?>

    <input
        type="text"
        name="my_plugin_message"
        value="<?php echo esc_attr( $message ); ?>"
        class="regular-text"
    >

    <?php
}

/**
 * Settings page.
 */
function my_plugin_settings_page() {
    ?>

    <div class="wrap">

        <h1>My Plugin Settings</h1>

        <form method="post" action="options.php">

            <?php

            settings_fields(
                'my_plugin_settings_group'
            );

            do_settings_sections(
                'my-plugin-settings'
            );

            submit_button();

            ?>

        </form>

    </div>

    <?php
}

/**
 * Frontend shortcode.
 */
function my_plugin_message_shortcode() {

    $message = get_option(
        'my_plugin_message',
        'Hello from my WordPress plugin!'
    );

    return '<div class="my-plugin-message">' .
        esc_html( $message ) .
        '</div>';
}

add_shortcode(
    'my_plugin_message',
    'my_plugin_message_shortcode'
);
After activating the plugin:
- Open WordPress Dashboard.
- Go to Settings.
- Open My Plugin.
- Enter a message.
- Save the settings.
- Create a page.
- Add:
[my_plugin_message]
- Publish the page.
- Open the page.
Your custom plugin-generated message should now appear.
39. How to Test a WordPress Plugin
Before releasing your plugin, test it systematically.
Test activation
Activate the plugin and check for errors.
Test deactivation
Deactivate it and verify that the website continues working.
Test settings
Change settings and confirm that the values are saved correctly.
Test frontend output
Check pages, posts and widgets where your plugin appears.
Test different users
Check behavior for:
- Administrator
- Editor
- Author
- Subscriber
- Logged-out visitor
Test invalid input
Try:
- Empty fields
- Very long values
- Special characters
- Invalid URLs
- Unexpected input
Test with other plugins
A plugin may work alone but conflict with another plugin.
Testing in a clean WordPress installation can help identify conflicts.
40. WordPress Plugin Development Best Practices
Follow these principles as your plugin becomes more advanced.
1. Use WordPress APIs
Do not reinvent functionality that WordPress already provides.
2. Sanitize input
Never trust user-submitted information.
3. Escape output
Escape data according to the output context.
4. Check permissions
Use capability checks for privileged operations.
5. Use nonces
Protect forms and sensitive requests.
6. Avoid core modifications
Use hooks and official APIs.
7. Use unique names
Prevent conflicts with other plugins.
8. Keep code organized
Separate administration, frontend, database and utility functionality.
9. Document your code
Comments can help future developers understand complicated logic.
10. Test before deployment
Never assume that code that works on one website will work everywhere.
41. How to Make a Plugin Faster
Performance matters because a poorly designed plugin can slow down an entire WordPress website.
Avoid loading large scripts and styles on every page when they are only needed in one location.
For example, an admin-only script should not be loaded across the public website.
Also consider:
- Efficient database queries
- Caching
- Conditional asset loading
- Avoiding unnecessary API requests
- Reducing repeated database operations
- Pagination for large datasets
A plugin should perform only the work it actually needs to perform.
42. WordPress Plugin Development and REST API
Modern WordPress plugins can communicate with external applications using the REST API.
This opens the door to:
- Mobile apps
- React interfaces
- JavaScript applications
- AI integrations
- External dashboards
- SaaS platforms
A plugin can register a REST endpoint using:
add_action(
    'rest_api_init',
    function () {

        register_rest_route(
            'my-plugin/v1',
            '/message',
            array(
                'methods'  => 'GET',
                'callback' => 'my_plugin_rest_message',
            )
        );
    }
);
The callback can return structured data.
For more advanced applications, REST API development becomes an important WordPress skill.
43. Can You Build an AI WordPress Plugin?
Yes.
A WordPress plugin can communicate with an external AI service through an API.
For example, an AI plugin could provide:
- AI content generation
- Text summarization
- SEO suggestions
- Customer support
- Chatbots
- Image generation
- Product description generation
- Content analysis
However, API credentials must be protected.
Never expose private API keys in frontend JavaScript or HTML.
A safer architecture is:
Visitor
   ↓
WordPress Plugin
   ↓
Server-side PHP
   ↓
AI API
   ↓
WordPress Plugin
   ↓
Visitor
The sensitive API credential stays on the server.
44. How to Prepare a Plugin for Distribution
If you want to distribute your plugin publicly, prepare:
- Plugin name
- Description
- Version number
- Author information
- License
- Documentation
- Installation instructions
- Screenshots
- Changelog
- Support information
- Security review
- Compatibility information
You should also check licensing requirements for third-party libraries, fonts, images and code.
45. WordPress Plugin Directory
Developers can submit plugins to the official WordPress.org plugin directory.
Before submission, review the current plugin guidelines and requirements because policies and technical expectations can change.
A publicly distributed plugin should be:
- Secure
- Clearly documented
- Properly licensed
- Free from unnecessary tracking
- Respectful of user privacy
- Compatible with WordPress requirements
- Properly structured
46. Plugin vs Theme: Which Should You Use?
A common beginner question is whether functionality belongs in a theme or plugin.
A useful rule is:
If the feature should remain active after changing the theme, it probably belongs in a plugin.
أمثلة:
| Feature | Usually belongs in |
|---|---|
| Website colors | Theme |
| Typography | Theme |
| Page layout | Theme |
| Contact form functionality | Plugin |
| SEO functionality | Plugin |
| Custom database system | Plugin |
| Custom post type | Plugin |
| Payment integration | Plugin |
| Header design | Theme |
| Business logic | Plugin |
This separation makes WordPress projects easier to maintain.
47. A Practical Learning Roadmap
If you are completely new to plugin development, learn in this order:
Stage 1 — PHP
Learn:
- Variables
- Arrays
- Functions
- Conditions
- Loops
- Classes
- Objects
- Namespaces
Stage 2 — WordPress basics
Learn:
- Plugins
- Themes
- Posts
- Pages
- Users
- Settings
- Media
- Dashboard
Stage 3 — WordPress APIs
Learn:
- Actions
- Filters
- Shortcodes
- Settings API
- Options API
- Metadata API
- HTTP API
Stage 4 — Security
Learn:
- Sanitization
- Escaping
- Nonces
- Capabilities
- Prepared SQL statements
Stage 5 — Advanced development
Learn:
- REST API
- AJAX
- Custom database tables
- Cron
- Blocks
- Object-oriented PHP
- External APIs
Stage 6 — Professional development
Learn:
- Git
- Testing
- Code standards
- Debugging
- Version control
- Deployment
- Documentation
48. Frequently Asked Questions
Is WordPress plugin development difficult?
It can be challenging initially, especially if you are new to PHP. However, you can learn it progressively by starting with simple plugins and gradually adding features.
Do I need PHP to develop WordPress plugins?
Yes. PHP is the primary programming language used for traditional WordPress plugin development. HTML, CSS and JavaScript are also useful.
Can beginners create WordPress plugins?
Yes. A beginner can start with a small plugin such as a shortcode, custom message, widget or simple settings page.
Can I create a plugin without changing the WordPress theme?
Yes. In fact, keeping functionality inside a plugin is often preferable when that functionality should remain available regardless of the active theme.
Can plugins have their own database tables?
Yes. A plugin can create custom database tables when the WordPress options or existing content structures are not appropriate for the data.
Are WordPress plugins written only in PHP?
PHP is the core language, but modern plugins can also use JavaScript, CSS, HTML and other technologies.
Can a WordPress plugin connect to an API?
Yes. Plugins can communicate with external services using WordPress’s HTTP API and other supported mechanisms.
Can I sell a WordPress plugin?
Yes. Developers can distribute commercial WordPress plugins through their own websites or appropriate marketplaces, provided they follow applicable licensing and distribution requirements.
How do I debug a plugin?
Use a development or staging environment, enable WordPress debugging, inspect logs, test systematically and isolate conflicts with other plugins or themes.
49. Final Conclusion
WordPress plugin development is one of the most powerful ways to customize WordPress.
Instead of modifying WordPress core files, developers can create independent functionality using WordPress hooks, APIs and PHP.
In this tutorial, we covered the complete basic workflow:
- Creating a plugin folder
- Creating the main plugin file
- Adding plugin metadata
- Activating a plugin
- Creating shortcodes
- Loading CSS and JavaScript
- Creating an admin settings page
- Saving options
- Using actions and filters
- Sanitizing input
- Escaping output
- Using nonces
- Checking permissions
- Working with databases
- Creating activation and uninstall processes
- Debugging plugins
- Organizing plugin files
- Creating custom post types
- Using AJAX
- Working with REST APIs
- Preparing plugins for distribution
The best way to learn is to build progressively.
Start with a five-line plugin. Then create a shortcode. Next, add settings. After that, learn database operations, security, REST APIs and JavaScript.
Eventually, these skills can be combined to create complete WordPress applications rather than simple plugins.
The key principle is simple: build functionality independently, use WordPress APIs, validate everything, protect user data, and test your plugin before deploying it to production.