

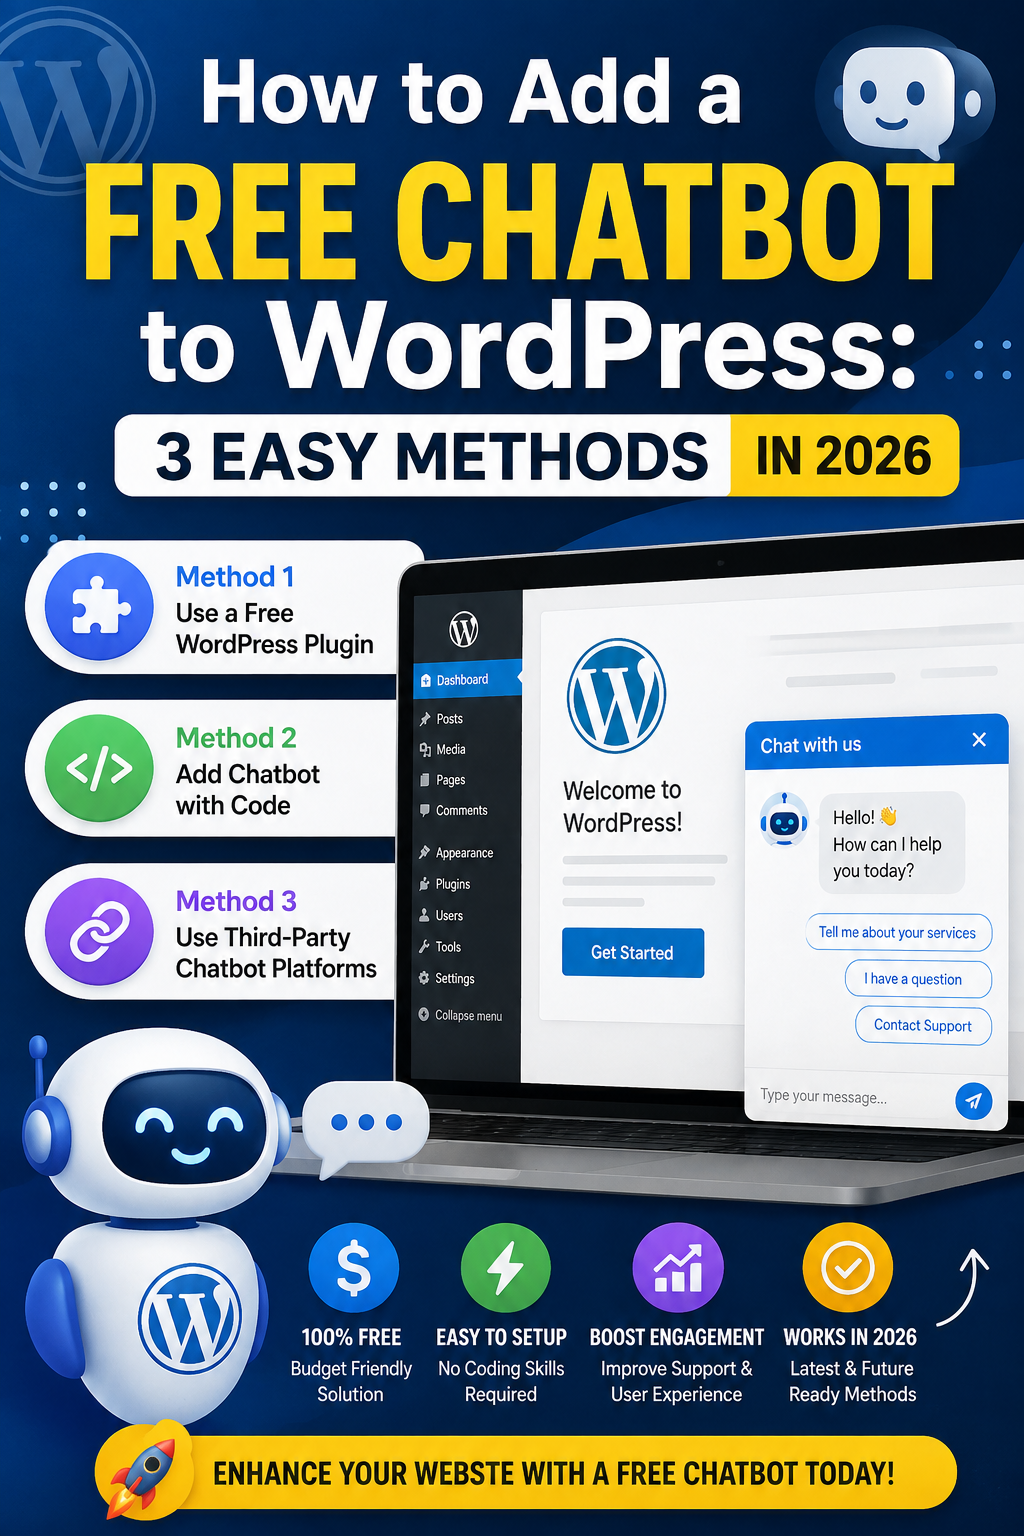
Adding a chatbot to a WordPress website no longer requires expensive software or advanced coding skills. In 2026, website owners can add free chatbots using WordPress plugins, third-party chatbot platforms, or simple embed codes.
A chatbot can answer frequently asked questions, guide visitors, collect leads, explain products and services, and provide basic customer support 24 hours a day.
This guide explains three simple methods to add a free chatbot to WordPress, including step-by-step instructions for beginners.
Important: “Free chatbot” can mean different things. Some solutions provide a free WordPress plugin but require an API key, while others offer a free service with usage limits. Always check the provider’s current pricing and limits before publishing a business-critical chatbot.
What Is a WordPress Chatbot?
A WordPress chatbot is a small conversational tool that appears on your website and allows visitors to communicate with an automated assistant.
Depending on the chatbot you choose, it can:
- Answer common questions
- Explain your services
- Help visitors find pages
- Collect contact information
- Generate leads
- Provide basic customer support
- Recommend products
- Guide users through forms
- Answer questions about your website content
- Operate outside normal business hours
Modern AI chatbots can provide natural-language answers instead of relying only on fixed buttons and menus.
WordPress currently has many chatbot options in its official plugin directory, including AI chatbots, live-chat tools, FAQ bots, and lead-generation chatbots. (WordPress.org)
Why Add a Chatbot to Your WordPress Website?
Before installing one, it helps to understand what a chatbot can actually do for your website.
1. Provide 24/7 Assistance
A chatbot can respond to visitors even when you are not available.
For example:
Visitor: What services do you offer?
Chatbot: We provide website development, SEO, WordPress, and AI automation services.
This can save you from answering the same questions repeatedly.
2. Improve User Experience
Visitors often leave a website when they cannot quickly find an answer.
A chatbot gives them another way to find information without searching through multiple pages.
3. Generate Leads
A chatbot can ask questions such as:
- What is your name?
- What service are you interested in?
- What is your email address?
- What type of website do you need?
You can then follow up with potential customers.
4. Reduce Repetitive Support Work
If customers frequently ask the same questions, you can train or configure your chatbot to answer them automatically.
5. Help Visitors Navigate Your Website
For example:
“Where can I find your pricing?”
The chatbot could direct the visitor to your pricing page.
Method 1: Add a Chatbot Using a Free WordPress Plugin
For most beginners, a WordPress plugin is the easiest method.
You do not need to manually edit theme files, and many plugins can be installed directly from the WordPress dashboard.
The official WordPress plugin directory currently lists numerous chatbot solutions, including WPBot, Tidio, AI Engine, Chatway, Collect.chat and others. (WordPress.org)
Step 1: Log In to WordPress
Open your WordPress administration area.
Usually, you can access it through:
yourwebsite.com/wp-admin
Enter your administrator username and password.
Step 2: Open the Plugin Directory
From the WordPress dashboard, go to:
Plugins → Add New Plugin
You will see a search box.
Search for:
Chatbot
or
AI Chatbot
WordPress will display available chatbot plugins.
Step 3: Choose a Plugin
There are many options, so do not install a plugin simply because it appears first.
Check:
- Number of active installations
- Recent updates
- WordPress compatibility
- User reviews
- Support information
- Features
- API requirements
- Free-plan limitations
For example, WPBot offers a free version with built-in chatbot functionality and can also connect to external AI services such as Gemini and OpenAI. (WordPress.org)
Another option is aGo AI Chatbot, which describes itself as a free AI chat widget and allows website owners to provide their own knowledge files. It uses a Google Gemini API key. (WordPress.org)
Step 4: Install the Plugin
After choosing your plugin:
- Click Install Now.
- Wait for WordPress to complete the installation.
- Click Activate.
The plugin should now be active.
Step 5: Open the Chatbot Settings
After activation, look at the WordPress dashboard menu.
The plugin may add a new menu such as:
Chatbot
AI Chatbot
WPBot
or another plugin-specific name.
Open the settings page.
Step 6: Configure the Welcome Message
Create a short and friendly greeting.
For example:
Hi! 👋 How can I help you today?
You can also provide suggested questions:
- What services do you offer?
- How much does a website cost?
- How can I contact you?
- Where can I read your tutorials?
Keep the first message simple.
Step 7: Add Frequently Asked Questions
If your chatbot supports predefined responses, create answers for your most common questions.
For example:
| Question | Example Answer |
|---|---|
| What services do you provide? | We provide WordPress, SEO, web development and AI solutions. |
| How can I contact you? | Visit our Contact page and send us a message. |
| Do you offer WordPress services? | Yes, we provide WordPress development and optimization services. |
| What are your working hours? | Our support team is available during our published business hours. |
This is particularly useful for small business websites.
Step 8: Customize the Appearance
Most chatbot plugins allow you to customize some visual settings.
You may be able to change:
- Chat button color
- Chat window color
- Icon
- Position
- Welcome message
- Font
- Bot name
- Button text
Choose colors that match your website branding.
Avoid making the chatbot too large because it can cover important content on mobile devices.
Step 9: Enable the Chatbot
Look for a setting such as:
Enable Chatbot
Turn it on and save your settings.
Now open your website in a new browser tab.
You should see the chatbot button.
Step 10: Test It
Do not immediately assume everything works.
Test the chatbot yourself.
Ask questions such as:
What services do you offer?
How can I contact you?
What is your pricing?
Where can I find your blog?
Also test the chatbot on a smartphone.
Method 2: Add an AI Chatbot Using a Free AI Service and WordPress Plugin
This method is useful if you want a chatbot that can understand natural-language questions.
Instead of relying entirely on predefined answers, the chatbot can use an AI model.
Some WordPress chatbot plugins support services such as Google Gemini, OpenAI and other AI providers. WPBot, for example, lists integrations with multiple AI services. (WordPress.org)
How This Method Works
The basic setup looks like this:
Visitor → WordPress Chatbot → AI Service → AI Response → Visitor
The WordPress plugin provides the chat interface, while the AI service generates the response.
Step 1: Install an AI Chatbot Plugin
Go to:
WordPress Dashboard → Plugins → Add New Plugin
Search for an AI chatbot plugin.
Choose one that supports the AI provider you want to use.
Step 2: Create an AI API Key
Depending on the plugin, you may need an API key.
For example, aGo AI Chatbot’s WordPress listing explains that users can connect their own Google Gemini API key and configure the chatbot from the WordPress dashboard. (WordPress.org)
The exact process depends on the AI provider and can change over time.
Step 3: Connect the API Key
Open the chatbot’s settings.
Find a field similar to:
API Key
Paste your API key into the appropriate field.
Save the settings.
Security Tip
Never publish your API key inside:
- Blog posts
- JavaScript visible to visitors
- Screenshots
- Public GitHub repositories
- Theme source code
Keep API credentials private.
Step 4: Choose the AI Model
Some plugins allow you to select an AI model.
Depending on the plugin, you may see different models or providers.
For a simple website chatbot, choose a model that provides an appropriate balance between:
- Quality
- Speed
- Cost
- Usage limits
Do not automatically select the most powerful model if your chatbot only needs to answer simple FAQs.
Step 5: Give the Bot Instructions
This is one of the most important steps.
Create a clear instruction for your chatbot.
For example:
You are the customer support assistant for our website. Answer questions about our WordPress, SEO and web development services. Keep responses short and easy to understand. If you do not know an answer, tell the visitor that you do not have enough information instead of inventing an answer.
Good instructions can make the chatbot more useful and reduce irrelevant answers.
Step 6: Provide Website Information
If your chatbot supports a knowledge base, provide useful information such as:
- About page
- Services
- Pricing
- FAQs
- Contact information
- Product descriptions
- Documentation
- Policies
Some modern WordPress chatbot plugins support knowledge-base or RAG-style functionality. WPBot, for example, lists RAG and website-content embedding among its capabilities. (WordPress.org)
A chatbot that has access to accurate website information can be more useful than one that only receives a generic instruction.
Step 7: Create a Strong Fallback Response
Your chatbot will not know everything.
Create a response for situations where it cannot confidently answer.
For example:
I’m not sure about that. Please contact our support team for the most accurate information.
This is better than allowing the bot to invent an answer.
Step 8: Test Different Questions
Ask:
Simple question
What services do you provide?
Specific question
Do you provide WordPress SEO services?
Unknown question
What will your company launch in 2030?
The chatbot should respond appropriately to all three.
Method 3: Add a Free Chatbot Using an Embed Code
The third method is useful if you do not want to depend entirely on a WordPress-specific chatbot plugin.
Some chatbot platforms allow you to create a bot externally and then embed it into your WordPress website.
The basic process is:
Create chatbot → Configure chatbot → Copy embed code → Add code to WordPress
This method can be particularly useful when you want to manage your chatbot from an external dashboard.
Step 1: Choose a Chatbot Platform
Search for a chatbot platform that offers a free plan or free trial and provides an embeddable widget.
Check the current limitations carefully because free plans can change.
Look for:
- Free usage allowance
- Number of conversations
- Branding restrictions
- AI model availability
- Knowledge-base support
- Lead collection
- WordPress compatibility
- Data and privacy policies
Step 2: Create Your Chatbot
Create an account on your selected platform.
Then create a new chatbot.
Give it a useful name, such as:
Website Support Assistant
or
AI Customer Support
Step 3: Add Your Website Information
Depending on the service, you may be able to provide:
- Website URLs
- Documents
- FAQs
- Text
- Product information
- Support articles
Keep the information accurate and up to date.
Step 4: Customize the Widget
Configure:
- Chat button
- Position
- Welcome message
- Colors
- Bot name
- Avatar
- Opening behavior
A simple design usually works best.
Step 5: Copy the Embed Code
The chatbot platform will usually provide a JavaScript or HTML snippet.
It may look similar to:
<script>
  /* Chatbot provider's embed code */
</script>
Do not copy this example as an actual working chatbot. Use the code generated by your selected chatbot service.
Step 6: Add the Code to WordPress
There are several ways to add third-party code.
Depending on your WordPress setup, you can use:
Appearance → Widgets
or a Custom HTML block.
Some platforms also provide their own WordPress plugin, which can make installation easier.
If the service gives specific installation instructions, follow those instructions rather than manually modifying WordPress core files.
Which Method Should You Choose?
Here is a simple comparison:
| Method | Difficulty | Best For | Coding |
|---|---|---|---|
| WordPress chatbot plugin | Easy | Beginners | No |
| AI chatbot + API | Medium | AI-powered support | Usually no |
| External chatbot + embed | Easy–Medium | Flexible chatbot platforms | Usually no |
Best for beginners
Method 1
A WordPress plugin is usually the simplest starting point.
Best for AI-powered answers
Method 2
Choose an AI chatbot plugin that supports your preferred AI provider and knowledge base.
Best for flexibility
Method 3
An external chatbot platform can be useful if you want to manage the chatbot separately from WordPress.
Free Chatbot vs Paid Chatbot
A common mistake is assuming that every chatbot described as “free” has unlimited AI usage.
That is not necessarily true.
There are three common models.
Model 1: Completely Free Plugin
The WordPress plugin itself may be free.
However, advanced AI features may require an external API.
Model 2: Free Plugin + Free AI Tier
The plugin may connect to an AI provider that offers some free usage.
This can work well for small websites, but usage limits can apply.
For example, aGo AI Chatbot currently describes its plugin as free while requiring users to supply their own Gemini API key. (WordPress.org)
Model 3: Free Chatbot Service
Some third-party platforms provide a free chatbot with limits on conversations, features, branding or usage.
Always check the current plan before choosing one for a high-traffic website.
How to Make Your WordPress Chatbot Better
Installing a chatbot is only the first step.
The quality of its answers depends heavily on how you configure it.
1. Give It Clear Instructions
Avoid:
Answer questions.
Instead use:
You are a helpful customer support assistant. Answer questions about our services using only the information provided in the website knowledge base. Keep answers concise and professional.
2. Keep Your Information Updated
If your pricing changes, update your chatbot knowledge.
If your contact email changes, update it.
If you launch a new service, add the information.
An outdated chatbot can create more problems than it solves.
3. Do Not Make Unsupported Claims
Tell your chatbot not to invent:
- Prices
- Discounts
- Policies
- Product specifications
- Guarantees
- Contact details
A good fallback message is:
I don’t have enough information to answer that accurately. Please contact our team.
4. Add Human Support
A chatbot should not always be the final destination.
Provide a clear option such as:
Contact Support
Talk to a Human
Send an Email
This gives visitors an alternative when the bot cannot solve their problem.
5. Keep Answers Short
Visitors usually do not want a 1,000-word response from a website chatbot.
Instead of:
Here is a very long explanation…
Use:
Yes. We provide WordPress development services. You can contact our team for a custom quote.
Short answers are easier to read, especially on smartphones.
How to Test Your Chatbot Before Launch
Use this simple testing process.
Test 1: Basic FAQ
Ask questions that the chatbot definitely knows.
Test 2: Misspelled Questions
For example:
How much wordpress website cost?
The chatbot should understand the basic intent.
Test 3: Unknown Questions
Ask something outside your website information.
The bot should admit that it does not know.
Test 4: Mobile Testing
Open your website on:
- Android
- iPhone
- Tablet
Make sure the chatbot does not cover important buttons.
Test 5: Speed
Check whether opening the chatbot significantly affects your website’s loading performance.
Test 6: Contact Forms
If the chatbot collects email addresses or phone numbers, verify that submissions actually reach you.
Common WordPress Chatbot Problems
Problem 1: Chatbot Does Not Appear
Check:
- Is the plugin activated?
- Is the chatbot enabled?
- Did you save the settings?
- Is another plugin blocking the script?
- Is a caching plugin serving an old version?
- Is the chatbot restricted to certain pages?
Problem 2: AI Responses Are Incorrect
Check your:
- System instructions
- Knowledge base
- Website content
- AI model
- Prompt settings
Also provide a fallback response for unknown questions.
Problem 3: API Key Error
If an AI chatbot requires an API key:
- Confirm that the key is correct.
- Check whether the API service is enabled.
- Check your account’s usage limits.
- Confirm that the selected model is supported.
- Review the plugin’s documentation.
Problem 4: Chatbot Is Too Slow
A chatbot can depend on external services, which means the response may take longer than a normal website page.
Try:
- Using a faster model
- Reducing unnecessarily long prompts
- Limiting the amount of information sent with every request
- Removing unnecessary integrations
Is a Free Chatbot Good Enough for a Business Website?
For a small website, blog, portfolio or startup, a free chatbot can be enough to handle basic questions.
For a larger business, you may eventually need features such as:
- Advanced analytics
- CRM integration
- Human handoff
- Multiple agents
- Higher AI usage limits
- Advanced lead generation
- E-commerce integrations
- Detailed conversation history
Start with the free option and upgrade only when you actually need additional functionality.
Best Practices for AI Chatbots in 2026
AI chatbots are becoming more capable, but they should still be treated as assistants rather than unquestionable sources of truth.
Follow these practices:
Be transparent
Let visitors know they are interacting with an AI assistant when appropriate.
Protect private information
Do not ask visitors for sensitive information unless there is a legitimate reason and appropriate security controls.
Use reliable information
Your chatbot should be based on current website information.
Provide human assistance
Make it easy for visitors to contact a real person.
Monitor conversations
Review chatbot interactions periodically to discover:
- Frequently asked questions
- Incorrect answers
- Missing information
- New customer needs
These conversations can also help you improve your website’s FAQ and support pages.
Frequently Asked Questions
Can I add a chatbot to WordPress for free?
Yes. WordPress has many chatbot plugins and third-party chatbot options with free versions or free usage tiers. However, “free” may come with limits or may require an external API key. (WordPress.org)
Do I need coding knowledge?
No. The easiest WordPress chatbot plugins can be installed from the WordPress dashboard without writing code.
Can a chatbot answer questions about my website?
Yes. Some AI chatbot solutions support knowledge bases or website-content retrieval. For example, several current WordPress chatbot plugins advertise knowledge-base or website-content features. (WordPress.org)
Can I use an AI chatbot without paying?
Sometimes. Some combinations of WordPress plugins and AI providers offer free tiers. However, usage limits, API costs and plan restrictions vary.
Is a chatbot good for SEO?
A chatbot itself is not a replacement for SEO. It can improve user experience and help visitors find information, but you should still create useful, crawlable website content.
Can I add a chatbot to WooCommerce?
Yes. Several WordPress chatbot solutions support WooCommerce or e-commerce-related functionality. Check the specific plugin’s current feature list before installing it. (WordPress.org)
Which method is easiest?
For most beginners, installing a chatbot plugin from Plugins → Add New Plugin is the easiest approach.
Final Thoughts
Adding a free chatbot to WordPress in 2026 is much easier than it was a few years ago.
The three simplest approaches are:
- Install a WordPress chatbot plugin
- Connect a WordPress chatbot to an AI service
- Create a chatbot on an external platform and embed it into WordPress
If you are completely new to WordPress, start with Method 1. It requires the least technical knowledge and lets you test whether a chatbot is actually useful for your audience.
If you want more intelligent answers, move to Method 2 and connect an AI service with a properly configured knowledge base.
The most important point is not simply installing a chatbot. Give it accurate information, clear instructions, useful FAQs, a safe fallback response, and an easy way for visitors to contact a human.
That combination can turn a simple chat icon into a useful customer-support and lead-generation tool for your WordPress website.